- Capabilities
- Industries
- Businesses
-
- Insights
-
- About Us
-
-
NYSE: NNI
- Loading...
Pricing delayed 20 minutes
-
-
-
- Careers
-
-
Our customers are our clients, leaders, team members, and peers. I love the fact that every day the people I work with are completely different.
Stacy
Nelnet manager
-
-
-
Getting Started
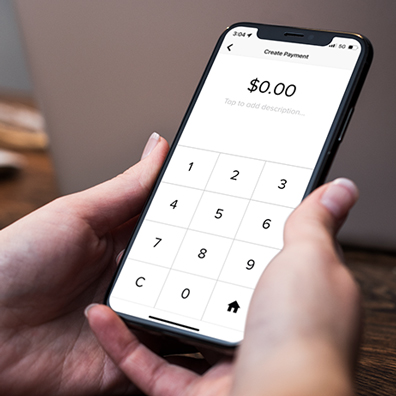
Download the NPS mPOS app from the Apple App Store or the Google Play Store.
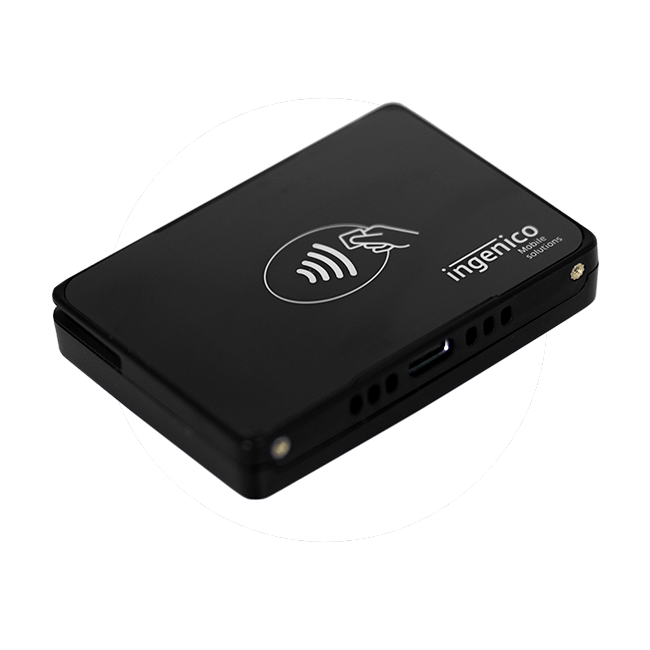
Ensure your Mobile Card Reader is charged and powered on, then follow the directions below to connect to an Android or iOS (Apple) mobile device in order to begin accepting payments.
iOS (Apple) Setup Instructions
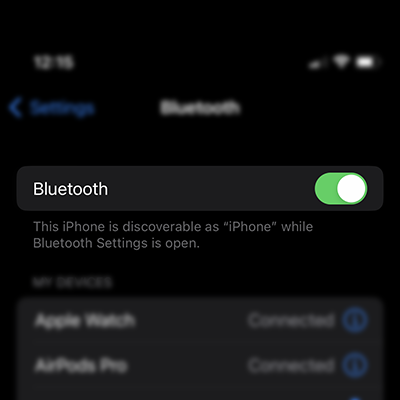
In settings on your phone or tablet, ensure Bluetooth is enabled and discoverable.
Open the NPS mPOS app and sign in with your username and password.
Access the menu in the top left corner of the app and select Device Settings.
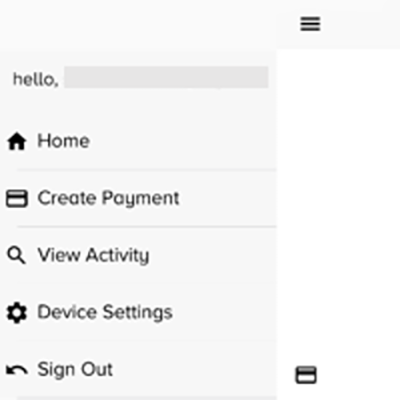
When connecting for the first time, you will receive the message “No Device Configured.” Click OK.
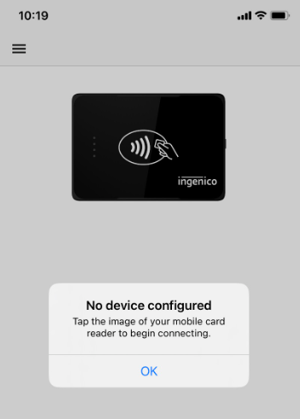
To connect your Mobile Card Reader:
- Select the image of the Mobile Card Reader in the app.
-
Instructions will appear. Click OK.
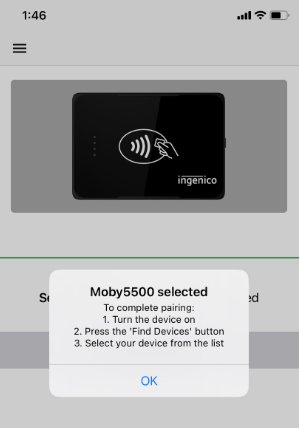
- Click FIND DEVICES.
- Locate and select the desired Mobile Card Reader from the results. If you have multiple devices, use the latter half of the numbers that appear below the QR code on the backside of your Card Reader.
-
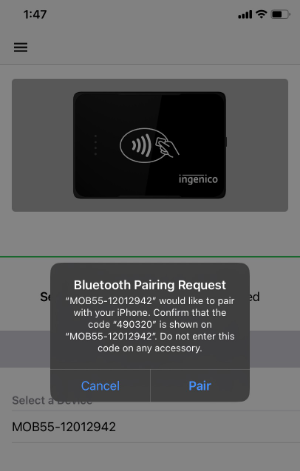
When a Bluetooth pairing request appears, select Pair. (Note: The 6 digit code provided is not applicable to the device set up and can be disregarded. Click “Pair” to proceed.)
- Your Mobile Card Reader will make a sound and colored LED lights will appear on the front left-hand side (next to the tap icon). This pattern of lights will match the pattern displayed in the NPS mPOS app.
-
Rotating the Mobile Card Reader 90 degrees clockwise, match the lights to the pattern shown in the NPS mPOS app.
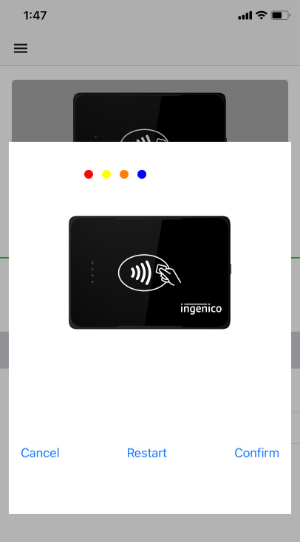
- If you need to see the pattern again, select Restart.
- Once the lights match, select Confirm.
- If the pairing was successful, a message will appear. Click OK.
You are now ready to accept payments anywhere with your Nelnet Payment Services Mobile Card Reader.
Access the menu in the top left corner of the app and return to the desired screen – home, create payment, view activity.
Android Setup Instructions
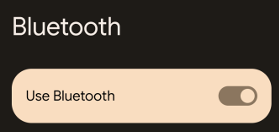
In settings on your phone or tablet, ensure Bluetooth is enabled and discoverable.
Open the NPS mPOS app and sign in with your username and password.
Access the menu in the top left corner of the app and select Device Settings.

When connecting for the first time, you will receive the message “No Device Configured.” Click OK.
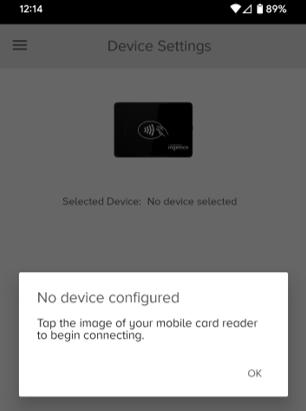
To connect your Card Reader:
- Select the image of the Mobile Card Reader in the app.
-
Instructions will appear. Click OK.
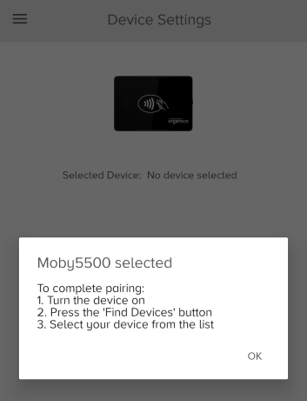
- Click FIND DEVICES.
- Locate and select the desired Mobile Card Reader from the results. If you have multiple devices, use the latter half of the numbers that appear below the QR code on the backside of your Card Reader.
-
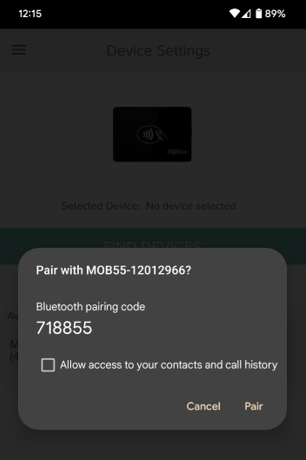
When a Bluetooth pairing request appears, select Pair. (Note: The 6 digit code provided is not applicable to the device set up and can be disregarded. Click “Pair” to proceed. It is not required to check the box to allow access to your contacts and call history)
- Your Mobile Card Reader will make a sound and colored LED lights will appear on the front left-hand side (next to the tap icon). This pattern of lights will match the pattern displayed in the NPS mPOS app.
-
Rotating the Mobile Card Reader 90 degrees clockwise, match the lights to the pattern shown in the NPS mPOS app.
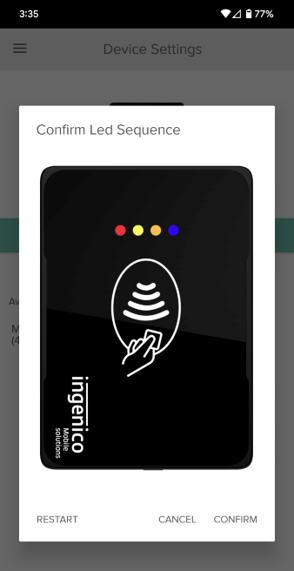
- If you need to see the pattern again, select Restart.
- Once the lights match, select Confirm.
-
A message will appear telling you the pairing was successful.
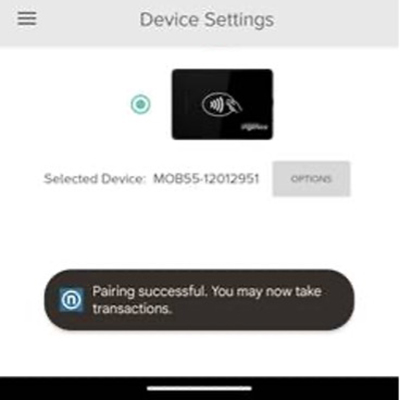
You are now ready to accept payments anywhere with your Nelnet Payment Services Mobile Card Reader.
Access the menu in the top left corner of the app and return to the desired screen – home, create payment, view activity.
Important Information
-
1
Mobile Device Requirements
- iOS (Apple) – version 12 or newer
- Android – version 10 or newer
-
2
Payment Acceptance
- Tap & Dip
- Cards with a chip must be processed via tap or dip.
- After 3 unsuccessful attempts at tap or dip, the Mobile Card Reader will allow a payment attempt via swipe.
- Contactless/tap payments may be accepted via virtual wallet using a payer’s mobile device/smart watch.
- The Mobile Card Reader’s Bluetooth indicator light will display blue when ready to accept tap or dip payments.
- Cards with a chip must be processed via tap or dip.
- Swipe
- Cards without chips must be swiped.
- Tap & Dip
-
3
Battery Life + Charging Recommendations
- Charge the Mobile Card Reader for a minimum of 2 hours before use.
- A fully charged Mobile Card Reader can last up to 8+ hours powered on with no activity.
- Power the Mobile Card Reader off until needed to preserve the battery life.
- A low battery may cause transactions to decline and/or general connectivity issues.
- We recommend keeping the USB charging cable readily available during events.
-
4
Mobile Card Reader Basics
- Power button is located on the right-hand side of the Mobile Card Reader in the middle.
- The red light is the power indicator.
- The blue light is the Bluetooth indicator.
- To power on, press and hold the power button until the Mobile Card Reader beeps and the red power light displays.
- To power off, press and hold the power button until all lights turn off.
- The Mobile Card Reader will remain on until the battery has no remaining charge.
- We recommend powering off the Mobile Card Reader when not in use to preserve the battery life.
-
5
Receipts
- If you wish to send email receipts, ensure to review your receipt templates located in the Gateway Dashboard (Account>Receipt Templates).
- To send receipts for a refund, you must elect email receipts (not text) to display the full refund amount.
Troubleshooting
-
- To power on, press and hold the power button until the power light turns red, and the Bluetooth indicator light blinks blue.
- Make sure that your Mobile Card Reader is charged. See Battery Life + Charging Recommendations.
-
To power off, press and hold the power button until all lights disappear.
-
If a card has a chip, the card must either process via the dip or tap methods. The card can only be swiped after three failed dip or tap attempts.
-
- Ensure that the blue light is visible on the front of the Mobile Card Reader. If you do not see the blue light, check firmware settings to see if there is an update available (Main Menu > Device Settings > Device Menu > Check Firmware Update)
- When the screen displays “Ready for Card”:
- For dip payments: Insert the card fully with the front of the card facing up. Ensure that the card remains in the Mobile Card Reader until you receive either a successful or declined message.
- For tap payments: Place the card, or electronic wallet device, on the Mobile Card Reader’s contactless icon, either touching or hovering just above. Ensure that the card, or electronic wallet, remains in place until you receive either a successful or declined message.
-
If you’re struggling to connect the Mobile Card Reader, try any of the following before attempting to re-pair/connect:
- Check your phone or tablet’s Bluetooth settings to ensure that Bluetooth is enabled/discoverable.
- Forget/Clear any previously paired Mobile Card Reader(s)
- Within your phone or tablet’s settings, manually unpair or forget any previously paired Mobile Card Reader(s).
- Within the NPS mPOS app, go to Device Settings within the main menu. If you already have a Mobile Card Reader selected, click the device menu, and select Reset.
- Restart the NPS mPOS app.
- Logout and then log back in.
- Uninstall and re-download the NPS mPOS app from your app store.
-
If you’re struggling to disconnect the Mobile Card Reader, try any of the following:
- Forget/Clear any previously paired Mobile Card Reader(s)
- Within your phone or tablet’s settings, manually unpair or forget any previously paired Mobile Card Reader(s).
- Within the NPS mPOS app, go to Device Settings within the main menu. If you already have a Mobile Card Reader selected, click the device menu, and select Reset.
- Restart the NPS mPOS app.
- Logout and then log back in.
- Uninstall and re-download the NPS mPOS app from your app store.
- Forget/Clear any previously paired Mobile Card Reader(s)
-
A Mobile Card Reader cannot be connected to more than one phone or tablet simultaneously. If one user’s phone or tablet is connected to the Mobile Card Reader, but they will no longer be overseeing the in-person payments, it’s imperative that the connected phone or tablet be forgotten/cleared before a new phone or tablet is paired, per the following:
- Within the NPS mPOS app, go to Device Settings within the main menu. If you already have a Mobile Card Reader selected, click the device menu, and select Reset.
- Within your phone or tablet’s settings, manually unpair or forget any previously paired Mobile Card Reader(s).
Nelnet Payment Services, LLC is a registered ISO of PNC Bank, N.A. Pittsburgh, PA.


